Description:
Today we
are going to see how to Configure Forms Based Authentication in SharePoint
2013. In SharePoint, Microsoft offering two different types of authentication
such as Windows Authentication and Forms Based Authentication. By default
we will get the windows authentication to our site but if we want to provide
the Forms based authentication to our SharePoint site we must have to do some
settings while creating of web application of a site. Now we will see step by
step process of configuring forms based authentication in SharePoint 2013.
What is Windows Authentication in SharePoint?
Windows
authentication is a secure form of authentication which is offered by Microsoft
and the user name and password are hashed before being sent across the network.
When you enable the Windows authentication in our SharePoint Site, the client
browser sends a strongly hashed version of the password in a cryptographic
exchange with our Web Server. We will get the users information such as
username, password, role, and group he/she belongs, from the Active Directory
and store the user information into content database of SharePoint, this will
happens in installation process of SharePoint Farm or we can do it after
installation of SharePoint using user management services in SharePoint.
What is Form Authentication in
SharePoint?
Some
companies maintain their employ user information in databases rather than
Active Directory. So here all the users information such as usernames,
passwords, roles and groups will stored in a database that may be MS SQL,
Oracle or MySQL in this type of situations most of the companies will prefer to
use form based authentication instead of rebuild the new Active Directory.
Steps to work with FBA
1 1. Create Database
2. Create Web Application
3. Modify 3 web. Configuration files
i.
FBA
(web Application)
ii. Central
Administration
iii. STS
(Security service Token)
4.Set user policy
Step-1: Create Database
Create
Database using aspnet_regsql.exe
Application
Go to the
location C:\Windows\Microsoft.NET\Framework64\v4.0.30319
And select aspnet_regsql.exe
right click select run as administrator
It opens
è
ASP.Net
SQL server Setup wizard
è
Click
on next button
è Select
the SQL server for application services and click on next button
è
Select
the server and data base details
Server:
SQL Server Name (System name) (ex: HYD38)
Select
authentication type windows
Database
Name: FBADB
è
Click
on next button and next and finish.
Note:
Check the database name FBADB and its table’s names (like users, roles ...Etc.) In SQL Server
Step step2: Create Web
Application
è
Go
to central administration
è
Click
on Application management
è
Click
on new
è
Give
following details
Click
on OK.
Web
application creates and it asks you want create site collection
Click
on Create Site Collection page.
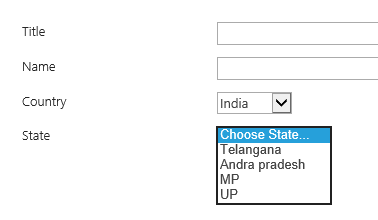
Create Site collection:
Give
site title, template name and primary site collection administrator name
Click
on OK button
Step3: Modify 3 web. Configuration
files
i.
FBADemo
Web Application web.config file (Add connection string, Membership provider and
role provider)
Go to IIS
Go to run
command (Window+R)
è
Enter
inetmgr
è
Press
enter button it open IIS
è
Go
to sites
Click
on web application (FBADemo – 6666)
a.
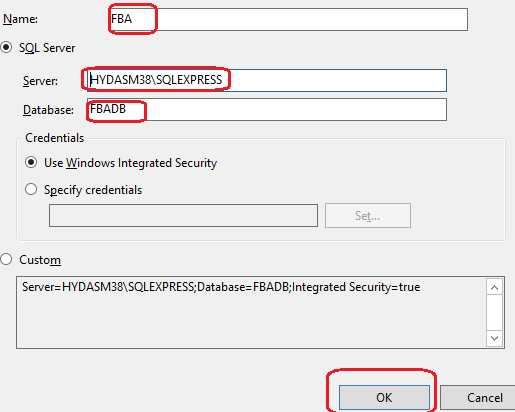
Connection string
In
middle pan double click on Connection Strings icon
On
the right pan click on Add and the enter the details bellow
Click
on OK button.
b. Member
ship provider
Click
on web application (FBADemo – 6666)
In
middle pan double click on Providers icon
In
middle pan select feature type .Net User
On the right pan click on Add and
the enter the bellow details
Click
on Ok button
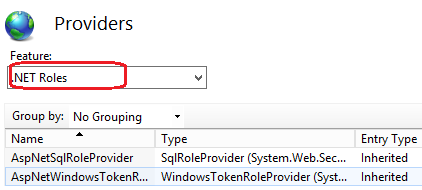
c. Role
provider :
Click
on web application (FBADemo – 6666)
In
middle pan select feature type .Net Roles
On the right pan click on Add and
the enter the bellow details
Click
on Ok button
d.
Create role
Click
on web application (FBADemo – 6666)
In
middle pan double click on .net Roles icon and it displays following error
message
We
need to change default role provider to FBARoleProvider
So
click on right pan set Default provider
And
change default provider ‘c’ to FBARoleProvider
Click
on OK
Click
on add right pane and give role name r1
Click
on OK
Similarly
create other roles like r2, r3, etc.
e.
Create User
Click
on web application (FBADemo – 6666)
In
middle pan double click on .net Users icon and it displays following error
message
We
need to change default member ship provider to FBAMembershipProvider
So
click on right pan set Default provider
And
change default provider ‘i’ to FBAMembershipProvider
Click
on OK
Click
on add right pane and give the details
Click
on next
Select
role type r1 and click on finish.
Similarly
create other users like user_02, user_03 etc.
Note: revert to default membership
provider FBAMembershipProvider to
‘i’ and
default role provider FBARoleProvider
to ‘c’
If you got
any error message just click on OK.
i.
Click
on web applications (SharePoint Central Administration v4)
Repeat the steps in
above web application (FBADemo – 6666)
a, b, c ( Connection
string , member ship provider and role
provider) details
ii.
Click
on web applications (SharePoint Web Services)
Repeat the steps in above web
application (FBADemo – 6666)
a, b, c ( Connection
string , member ship provider and role provider) details
Note: In
central admin we need to change default Membership provider
ASPNetSQLMembershipProvider to FBAMembershipProvider
Similarly Change
Default Role provider
ASPNetSQLRoleProvider to ASPNetWindowsTokenRoleProvider
1. Set user policy
Go
to center Admin select the FBADemo Web Application
Click
on user policy on the top of the ribbon
Next
click on Add users
Next
select “All zones”
Next
select the User: user_01 or All Users (FBAMembershipProvider)
And
Permission: full control
Click
On finish.
Note: Uncheck
the anonymous access to the web application. If you are not added user to user policy
you got following message
Sorry, this site hasn't been shared
with you.
So in user selection you can select All Users (FBAMembershipProvider) instead of user_01
Note: if
the site users have different permission levels so you can create separate
groups for users i.e. Viewers, Members and Owners. Add these users to
respective groups while creating the users at registration page.
Apply FBA permission to List
Go
to list
Click
on list settings
Next
click on permissions for this list
Next
Click on stop inheriting permission
It
display one popup like create unique permissions for this?
Click
on OK
Next
click on grant permissions on the top of the ribbon
Enter
All Users (FBAMembershipProvider)
Click
on show hide option select permission contribute, next click on Share.